Create a ladder in an existing pool
A ladder is a set of positions spread across a price range. You choose the range, amount and number of rungs; the app calculates the positions.
This guide takes you from choosing an existing pool to viewing your completed ladder. If you have not signed in yet, start with sign-in.
1. Prepare your wallet
Open the wallet dialog from the sidebar and choose the wallet you will use: MetaMask, Built-in or Browser. Check its address and balance on the network you want.
You need the tokens shown in the calculation and the network’s native coin for gas (BNB on BNB Chain, ETH on the other supported networks).
2. Find a pool
- Open Create.
- Choose the network and protocol — Uniswap or PancakeSwap.
- Paste the token contract address into Token contract address (0x…).
- Select a pool from the results. Check the token pair and pool fee.
The V3/V4 version and current price are filled in when the pool loads. Leave Fee as it is: a different fee means a different pool.
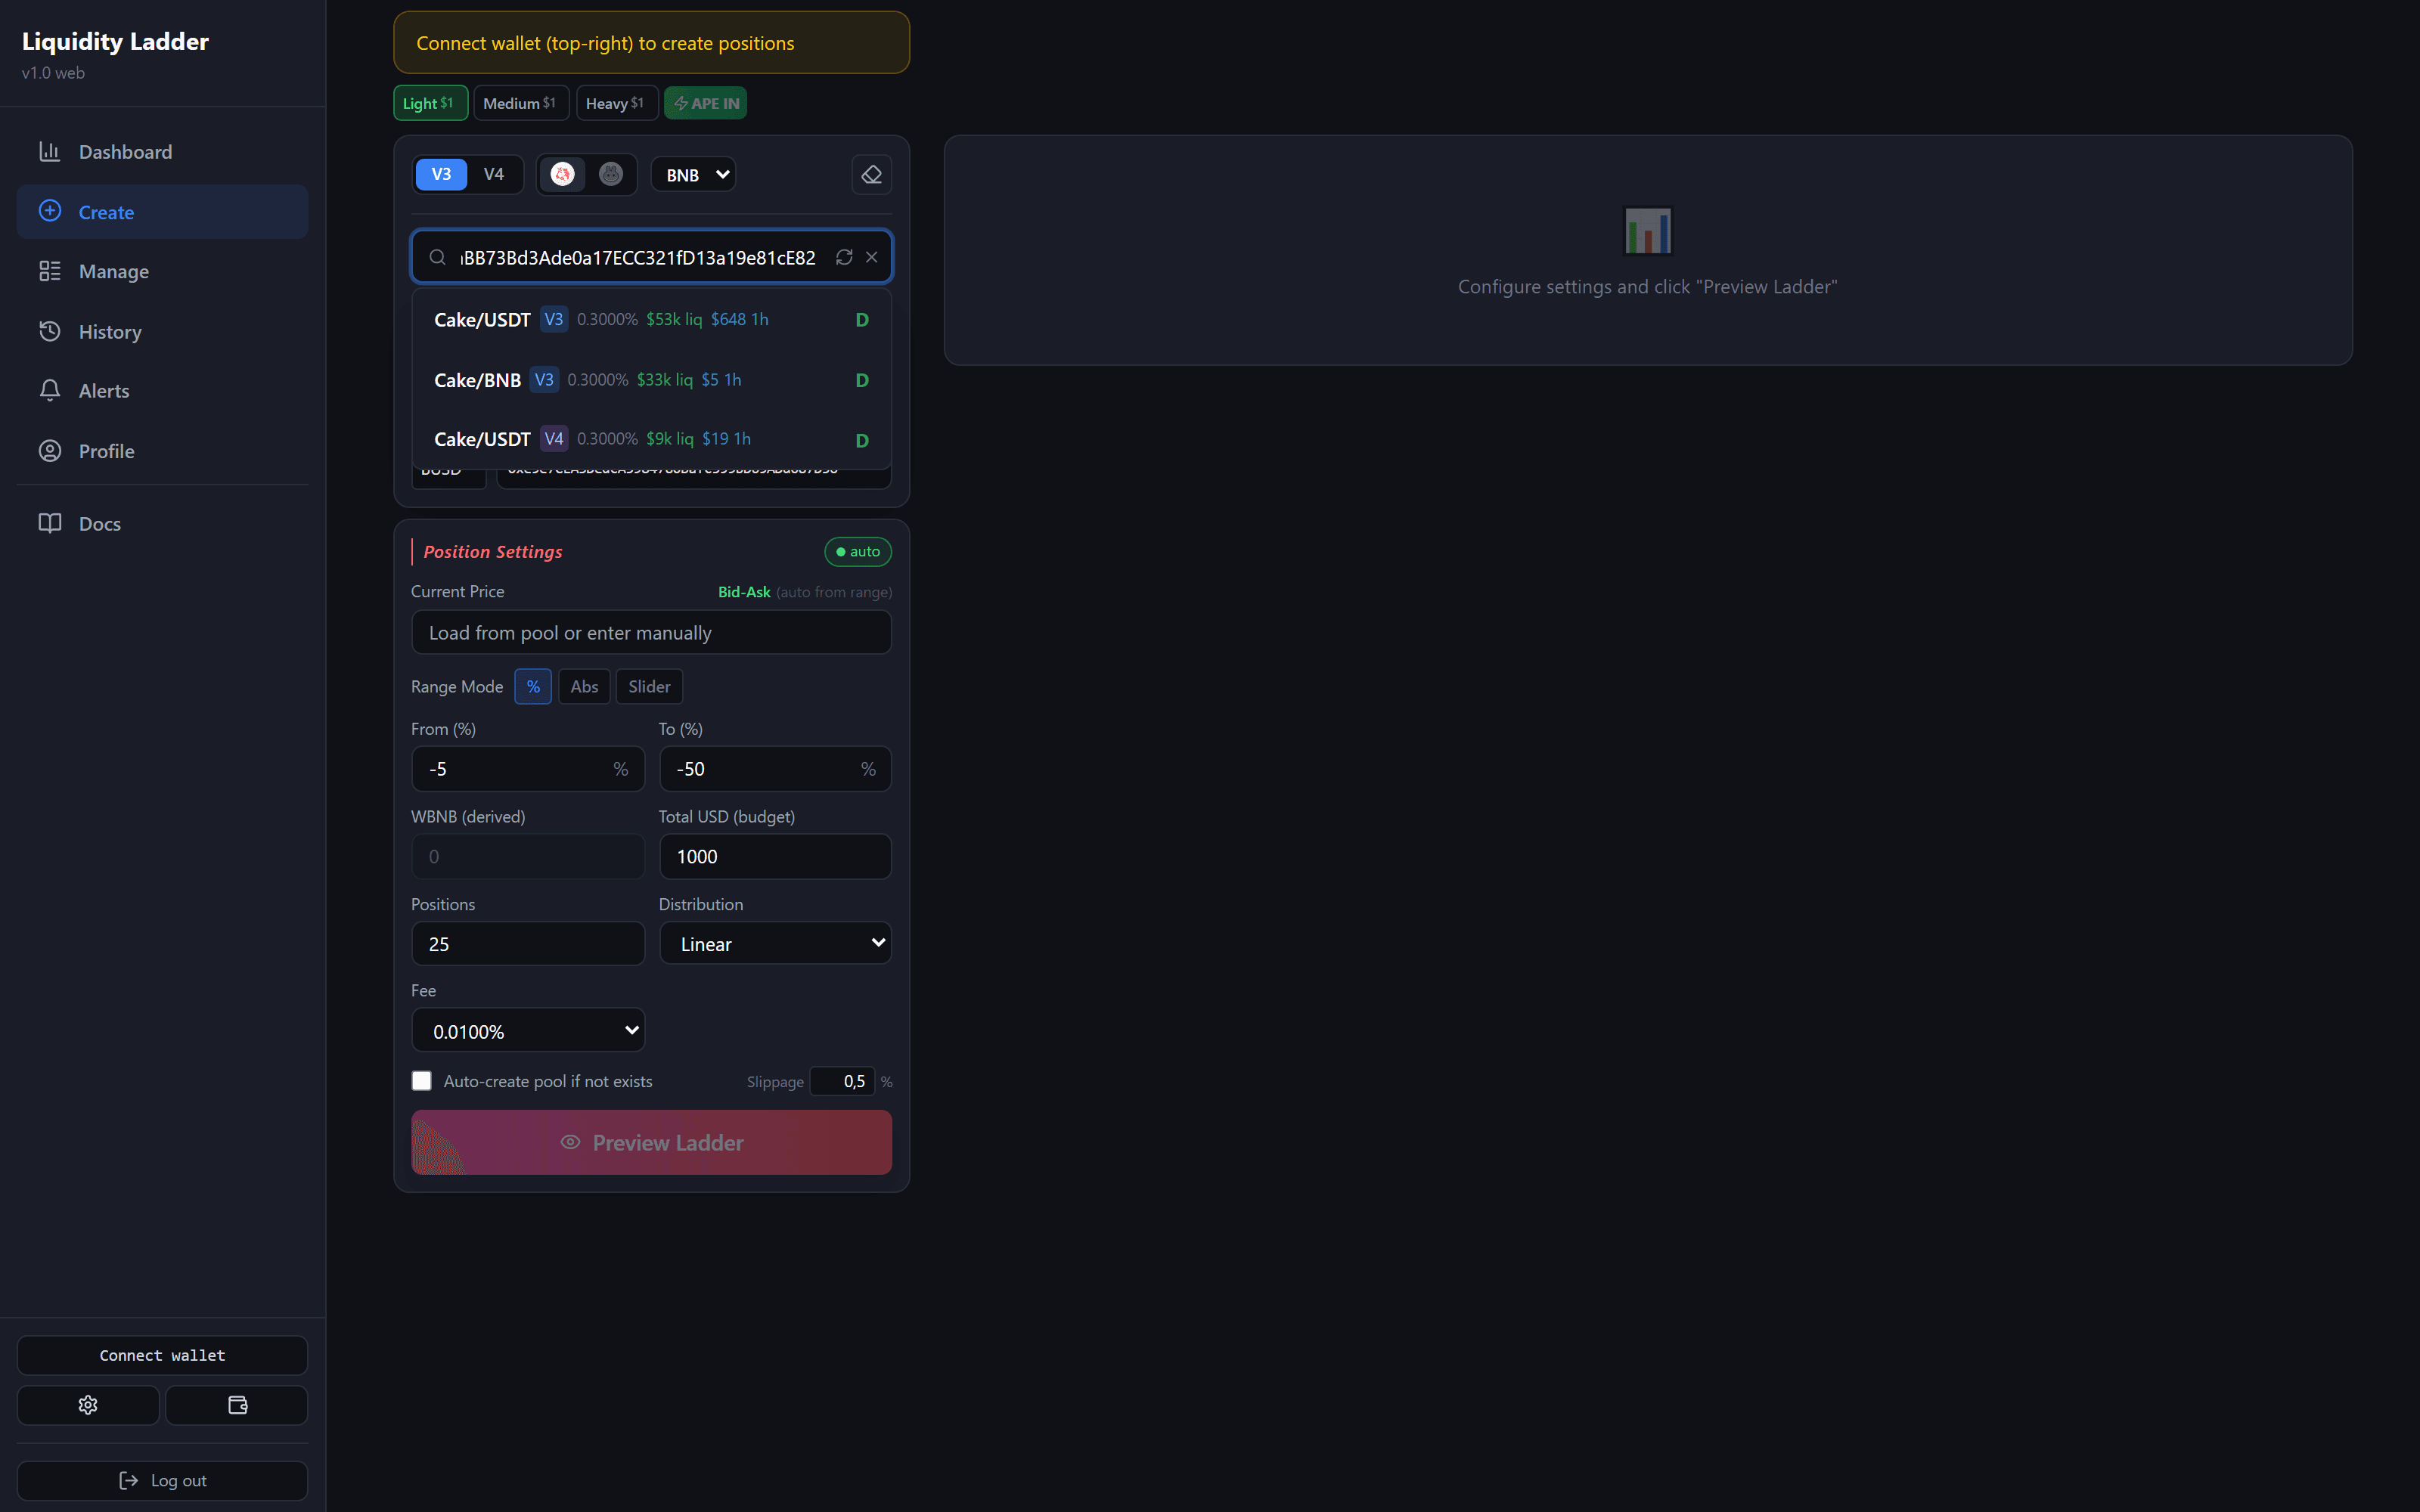
If the pool you need does not exist, see creating a new pool. If you already have its address, load it directly.
3. Set the range and amount
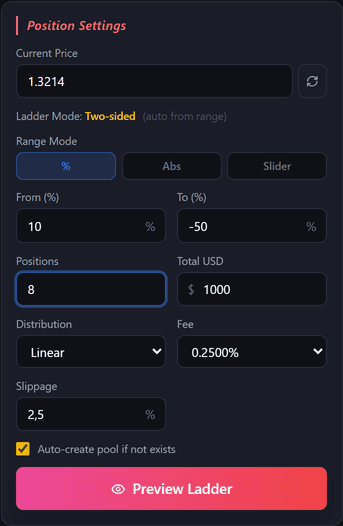
Under Position Settings, choose Range Mode → %.
- From (%) — upper bound relative to the current price.
- To (%) — lower bound relative to the current price.
- Positions — how many rungs to split the range into.
- Total USD — the amount in dollars.
- Distribution — how that amount is spread across the rungs.
For example, at a price of $1, From = 20 and To = -50 set a range from $0.50 to $1.20. This illustrates the fields; it is not a suggested range.
A range above and below the current price creates a two-sided ladder. See other examples for a range entirely below the price or a single wide position.
4. Check the calculation
The preview updates automatically when you change the parameters. Wait for it to finish, then check:
- the full range and number of rungs;
- the amount and how it is spread across the rungs;
- which tokens are needed and whether the selected wallet has enough.
The chart shows the rungs. To expand the table, click the arrow in its summary row. Token Needed shows the required token for each position.
If the ladder needs a second token you do not hold, see entering with one token — Zap.
If the app warns about a price deviation, check the pool and price before continuing. Do not confirm until you understand the discrepancy.
Allow for service fees and network gas when checking the amount.
5. Create the positions
Press Create V3 / Create V4. The button becomes available after the calculation.
With an external wallet, confirm the requested operations in that wallet. You may first need an Approve transaction, which allows the contract to spend a token. With the built-in or unlocked browser wallet, operations are signed through the app.
Wait for the result. Do not create again while the operation is running or its outcome is unknown. If a transaction hash is available, follow its link to check the status in the blockchain explorer.
6. Open the completed ladder
After Complete!, press View Positions. Manage opens with the created positions. Check their ranges, collect fees or close positions there.
If the ladder is missing from the Dashboard, follow these checks.